💻 My Linux Desktop Environment
I have used Linux as a desktop environment since about 2006, mostly with Gnome or Cinnamon.
Around 2016 I got bored of the general direction that most desktop environments (“DE” for short) were taking (what I would call “Apple-ization”) and decided to tailor, hand craft, optimize and automate my Linux DE.
By no way the aim was to make it sexy, but rather making it more efficient, distraction-free, fast, favoring keyboard usage, using as much display estate as possible.
Look how boring it is:

Please tell me what would be your first answer if I told you to reformat your computer right now?
Those questions are certainly popping up in most people head:
- do I actually have all my data backed up?
- I should save that very useful git config somewhere before reformatting!
- and how many hours would it take to get your working environment back to what it was, installing the OS, installing the right packages, reconfiguring options in app X and Y, etc.
I no longer have those concerns, and I will describe all the bits and pieces of my current DE that makes my life easier and probably a bit less stressful.
Disclaimer
Part of my job is to automate many different stuff for my customers. I enjoy automating all the things (even as a hobby) and I understand many people are not interested in spending time automating their DE.
I still believe, though, that with little efforts, one can improve their desktop experience tremendously.
This Desktop Environment is Probably not for You
The DE matches my work environment and my own workflows, at this point in time.
I don’t expect anyone to think this DE is the absolute best approach to desktops.
I just want to share what I came up with and hope it give you ideas.
Computer
A Lenovo Thinkpad T480s with 24GB of RAM and 1TB of SSD, currently running a regular and non customized Fedora Workstation 31 with Libvirt as virtualization layer.

Virtual Machines (VM)
I almost work exclusively inside Libvirt virtual machines and barely install anything on the host. I use virt-manager to access the VM.
I have worked in VM’s for the past 3 or 4 years.
Advantages:
- VM snapshots
- easy backups of VM on external disk
- easy migration/restore of VM if laptop fails
- thanks to virtual hardware, VM is “portable” from one laptop to another, I don’t have to think about different chipsets or such
- I have two almost similar VM: personal and work. The personal VM acts as “staging” for the work VM. If I’m trying to improve something in my DE, it is first tested on the personal VM, then it is promoted to “production” on the work VM, if the feature is stable/useful/etc.
- I have always split work and personal stuff. I don’t see why customer should see private Firefox bookmarks when I demo something for them.
- with the QEMU agent, performances can be close to native for a development or sysadmin machine
- Multi-screen is managed by the Fedora host and never caused any problem
Disadvantages:
- you have to install the QEMU agent on the VM
- you have to pause the VM before closing the lid
- changing brightness/volume/etc requires you to get out of the VM (moving the mouse cursor at the top center to collapse the “Leave fullscreen” menu is enough)
- AFAIK multi screen is still not yet available inside a VM, if you must present something on a projector, you have to mirror your host and project your VM
- but the lack of dual screen is not too annoying given my i3 workspaces and keyboard shortcuts, I’m more efficient on one screen in this setup that I ever was on a dual screen in Gnome
- most audio/video applications perform poorly: video conference, Discord, VLC
- don’t expect to play games inside a VM
- when resuming the VM, the clock is not syncing automatically
My Data
I run a self-hosted instance of Seafile.
![]()
I make sure that all data produced on my VM are backed up in Seafile (through mechanism of symlinks when the app won’t allow to specify a custom folder).
Seafile is very fast, this is crucial for short recovery time, in case of data loss.
My Seafile is backed up on an external NAS nightly.
As everything important is in Seafile, I can just reformat my VM and wouldn’t lose anything important.
VM Installation
I install a minimal Fedora Workstation in latest version.
I can PXE boot from my host machine but usually don’t bother with it, installing Fedora is only a few clicks anyway.
VM post provisioning
Once my OS is up and running, I install Ansible on it (sudo dnf install ansible) and run my guest.yml playbook.
The playbook takes care of:
- installing packages
- starting services
- creating user
- creating directories
- configuring firewall
- etc.
IMPORTANT: anything that I do on the VM (such as installing a package) always ends up inside the Ansible playbook. Do NOT be lazy about this or you will quickly lose track of what’s installed. Updating the playbook should become a reflex which can be difficult to acquire in the beginning.
Ansible actions are tagged for either personal machine, work machine or both.
Example of a tagged action:
  - name: install pip packages for work
    pip:
      name:
        - td-watson # time tracker
    tags: ['work']
Executing the playbook is done like this:
ansible-playbook -b guest.yml --tags work
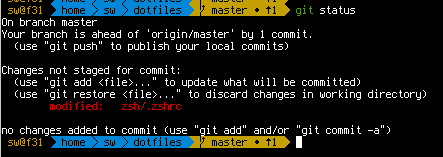
Dotfiles Management with Stow
The Ansible playbook takes care of installing applications.
I use stow to manage most applications configurations.
How does it work?
Basically you create a dotfiles directory in your $HOME folder.
Say that you want to manage your ZSH configuration (located under $HOME/.zshrc). You simply need to create a folder $HOME/dotfiles/zsh/ and move your .zshrc in the folder. Then from the dotfiles folder run stow zsh.
A symlink has been created:

The beauty of this is that your dotfiles folder can be a git repository. You can easily keep track of changes in your configurations, revert them or commit them.
Personal vs Work configurations
There are some application configurations that I want a bit different between the work VM and personal VM.
When the application doesn’t support conditions in its config files, you should create (and maintain) two separate configuration files (eg: config-work and config-personal).
In that case I have to figure out how to start the application with a different configuration file.
My i3 configuration is one of those and I created a GDM service that starts i3 with config-personal:
[Desktop Entry]
Name=i3 Personal
Comment=improved dynamic tiling window manager
Exec=i3 -c /home/sw/.i3/config-personal
TryExec=i3
Type=Application
X-LightDM-DesktopName=i3 Personal
DesktopNames=i3 Personal
Keywords=tiling;wm;windowmanager;window;manager;
NOTE: Some dotfiles managers can generate configuration files based on templates. This comes with the limitation that if you change something in the application GUI, the change would be overwritten the next time the configuration is rebuilt.
i3wm
I install i3, the tiling window manager. I keep Gnome around even though I never use it.
Screen Resolution
You can use xrandr to adjust your screen resolution.
If I need to work on a larger display, I just create a script that I call with a keybinding.
In this example, when I had to deal with a 2560x1440 display:
#!/bin/bash

cvt 2560 1440
xrandr --newmode "2560x1440_60.00"  312.25  2560 2752 3024 3488  1440 1443 1448 1493 -hsync +vsync
xrandr --addmode Virtual-0 2560x1440_60.00
xrandr --output Virtual-0 --mode 2560x1440_60.00
xrandr -s 2560x1440
Scratchpad
One of the lesser known feature of i3.
The scratchpad is a “hidden” workspace. You just don’t want your music player to take one full workspace, right?
So you just move it to the scratchpad and recall it when needed.
In order to put it away/recall, I have this config in i3:
bindsym $meta+z move scratchpad
bindsym $meta+s exec "~/.i3/scripts/scratchpad.py"
One of the inconvenient of recalling windows in the scratchpad is that windows are appearing in a random fashion.
This is the reason for scratchpad.py:
#!/usr/bin/env python3

import i3ipc
import subprocess
import re

i3 = i3ipc.Connection()

def get_scratchpad_windows():
    scratchpad_containers = i3.get_tree().scratchpad().descendants()
    return filter(lambda c: c.type == 'con' and c.name, scratchpad_containers)

def dmenu_choose(options):
    """ Show a dmenu to choose a string item from a list of *options*. """
    dmenu_process = subprocess.Popen(["dmenu", "-nb","#586e75","-nf","#000000","-sb","#000000","-sf","#FFDC48","-fn","terminus-9","-i","-p","Retrieve from scratchpad > ","-l","10"], stdin=subprocess.PIPE, stdout=subprocess.PIPE)
    stdoutdata, _ = dmenu_process.communicate("\n".join(options).encode())
    return stdoutdata.decode('utf-8')

def main():
    # Count how many apps in scratchpad
    list = []
    for leaf in i3.get_tree().scratchpad().leaves():
        listing = list.append(leaf)

    # shows the only app immediately
    if len(list) == 1:
        i3.command('scratchpad show')
    # otherwise show a dmenu
    else:
        scratchpad_windows = get_scratchpad_windows()
        window_titles = [w.name for w in scratchpad_windows]
        if window_titles:
            window_to_restore = re.escape(dmenu_choose(window_titles).strip())
            i3.command('[title="{}"] scratchpad show'.format(window_to_restore))

if __name__ == '__main__':
    main()
With this script, if only one window is in the scratchpad, it is recalled immediately.
If there’s more than one window, a dmenu menu appears and asks which window you want back.
i3blocks
I use i3blocks as my menu bar.
It is very easy to write scripts for it. I mostly write bash or python scripts.

In this screenshot we see “Pad 1” that shows how many windows I have in the scratchpad, this is the script:
#!/usr/bin/python

import subprocess
import simplejson

def getNodes(data):
    result = 0
    if data['scratchpad_state'] != 'none':
        result += 1
    if (len(data['nodes']) > 0) or (len(data['floating_nodes']) > 0):
        for node in (data['nodes'] + data['floating_nodes']):
            result += getNodes(node)
    return result

r = subprocess.check_output(["i3-msg", "-t", "get_tree"])
j = simplejson.loads(r)
c = getNodes(j)

if c > 0:
    d = "<span color='#a3be8c'>" + str(c) + "</span>"
else:
    d = str(c)

print("Pad " + d)
Next to it, the script shows the split mode (horizontal or vertical), a very important concept in i3. I do it with this script:
#!/usr/bin/env python3
import i3ipc

i3          = i3ipc.Connection()
splitv_text = '↓'
splith_text = '→'
split_none  = '•'
parent      = i3.get_tree().find_focused().parent

if parent.layout   == 'splitv' :
    print( splitv_text )
elif parent.layout == 'splith' :
    print( splith_text )
else                           :
    print( split_none  )
Terminator
My terminal emulator of choice since 2010.
Terminator comes with cool plugins such as “Watch for activity” or “Watch for silence”. When there’s activity or silence, you get a notification.
Plugins are easily written in Python.
Fonts
As seen in the GIF above, for the past couple of years, my font of choice for my DE has been Terminus (TTF version since bitmap is no longer supported in recent Pango releases).
Autokey
Autokey is a desktop automation utility.
It allows to create keyboard shortcuts for phrases that you type often and even scripts.
This is a keyword for a simple phrase:
And here’s a keyword triggering a Python script!
Clipit
Clipit is a lightweight clipboard manager.
This tool obviously implies that any sensitive data is kept for a while. You can filter out some content with regex rules.
task.sh (deprecated, see “Todo List”)
For tasks/todo list, I use a tool I wrote myself.
I couldn’t find a simple and lightweight task app that integrates well with i3wm, so I wrote my own.
Download task.sh
Todo List
I use a self-hosted Kanboard for my todo list (and groceries list, etc.).
I made an i3blocks script to retrieve the number of tasks in each column of the todo board:
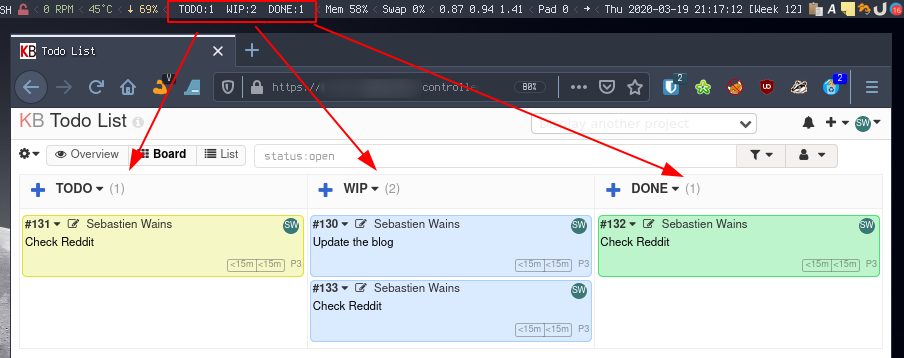
This is the script:
#!/bin/bash
curl --silent \
-u "USERNAME:TOKEN" \
-d '{"jsonrpc": "2.0", "method": "getBoard", "id": 1, "params": {"project_id": 6}}' \
https://kanboard.example.org/jsonrpc.php  | jq '.result[].columns[]|" ",.title,":",.nb_open_tasks," "' | tr -d '\n' | sed -e 's/"//g'
Zsh
I use powerlevel10k as my ZSH theme. It is a fork of powerlevel9k, on steroid.
I use the following ZSH plugins:
- git
- sudo
- tmux
- k
- dirhistory
- z
- zsh-autosuggestions
- zsh-syntax-highlighting
This is my configuration (be very careful, the order of options in your config is important):
export ZSH="${HOME}/.oh-my-zsh"
export TERM="xterm-256color"

ZSH_THEME="powerlevel10k/powerlevel10k"

CASE_SENSITIVE="false"
HYPHEN_INSENSITIVE="true"

POWERLEVEL9K_LEFT_PROMPT_ELEMENTS=(context dir dir_writable vcs)
POWERLEVEL9K_RIGHT_PROMPT_ELEMENTS=(status root_indicator background_jobs history time)

POWERLEVEL9K_BACKGROUND_JOBS_VERBOSE="true"
POWERLEVEL9K_BACKGROUND_JOBS_BACKGROUND="yellow"
POWERLEVEL9K_BACKGROUND_JOBS_FOREGROUND="black"

POWERLEVEL9K_DIR_HOME_BACKGROUND="032"
POWERLEVEL9K_DIR_HOME_SUBFOLDER_BACKGROUND="032"
POWERLEVEL9K_DIR_DEFAULT_BACKGROUND="244"
POWERLEVEL9K_DIR_ETC_BACKGROUND="202"

POWERLEVEL9K_VCS_CLEAN_BACKGROUND="green"
POWERLEVEL9K_VCS_MODIFIED_BACKGROUND="yellow"
POWERLEVEL9K_VCS_UNTRACKED_BACKGROUND="red"

POWERLEVEL9K_STATUS_ERROR_BACKGROUND="red"
POWERLEVEL9K_STATUS_OK_BACKGROUND="green"
POWERLEVEL9K_STATUS_OK_FOREGROUND="black"

POWERLEVEL9K_DIR_PATH_SEPARATOR="%F{black} $(print $'\uE0B1') %F{black}"
POWERLEVEL9K_DIR_PATH_ABSOLUTE=true
POWERLEVEL9K_DIR_OMIT_FIRST_CHARACTER=true

POWERLEVEL9K_HOME_ICON=''
POWERLEVEL9K_HOME_SUB_ICON=''
POWERLEVEL9K_FOLDER_ICON=''
POWERLEVEL9K_ETC_ICON=''

plugins=(git sudo tmux k dirhistory z zsh-autosuggestions)

ZSH_TMUX_AUTOSTART=false

ZSH_AUTOSUGGEST_BUFFER_MAX_SIZE=50

export EDITOR='vim'

alias -s {yml,yaml}=ansible-playbook
alias -s {conf,adoc,md}=code

_comp_options+=(globdots)
zstyle ':completion:*' special-dirs false

fg() {
    if [[ $# -eq 1 && $1 = - ]]; then
        builtin fg %-
    else
        builtin fg %"$@"
    fi
}

source $ZSH/oh-my-zsh.sh

bindkey '^ ' autosuggest-accept

if [ -f /usr/share/zsh-syntax-highlighting/zsh-syntax-highlighting.zsh ]; then
	source /usr/share/zsh-syntax-highlighting/zsh-syntax-highlighting.zsh
elif [ -f $HOME/.oh-my-zsh/custom/plugins/zsh-syntax-highlighting/zsh-syntax-highlighting.zsh ]; then
	source $HOME/.oh-my-zsh/custom/plugins/zsh-syntax-highlighting/zsh-syntax-highlighting.zsh
fi

if [ -f ${HOME}/.bash_aliases ]; then
	source ${HOME}/.bash_aliases
fi
Ulauncher
My launcher of choice is Ulauncher, it used to be Alfred but development slowed down.
Ulauncher comes with a ton of nice plugins available at https://ext.ulauncher.io.
I use those:
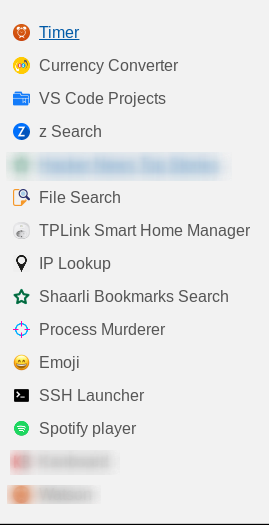
I wrote and open sourced two plugins to manage TPLink smart plugs and another one to search in my self hosted bookmarks.


VS Code Editor
My editor of choice is vscode.
I use the following plugins:
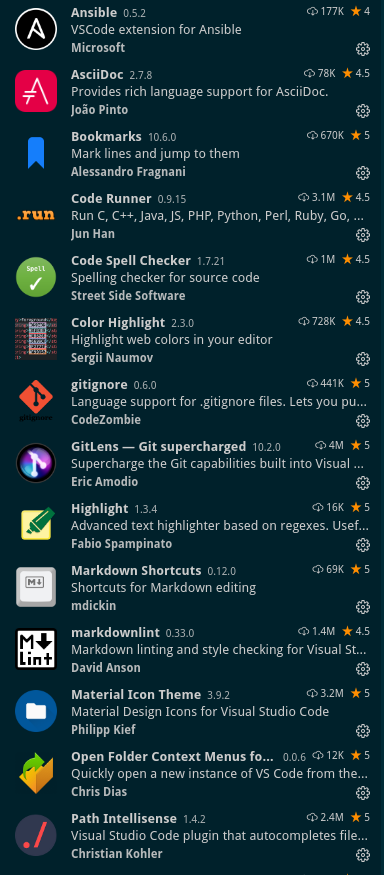

The most interesting ones are:
- Project Manager: allows to open project directories very easily. You maintain a JSON file with your projects and in a click you can open a project.
Ulauncher also has a plugin taking advantage of the JSON file.

- Settings Sync: allows to sync your vscode settings in a Github gist
Thunar
Thunar is a super lightweight file manager originally developed for XFCE.
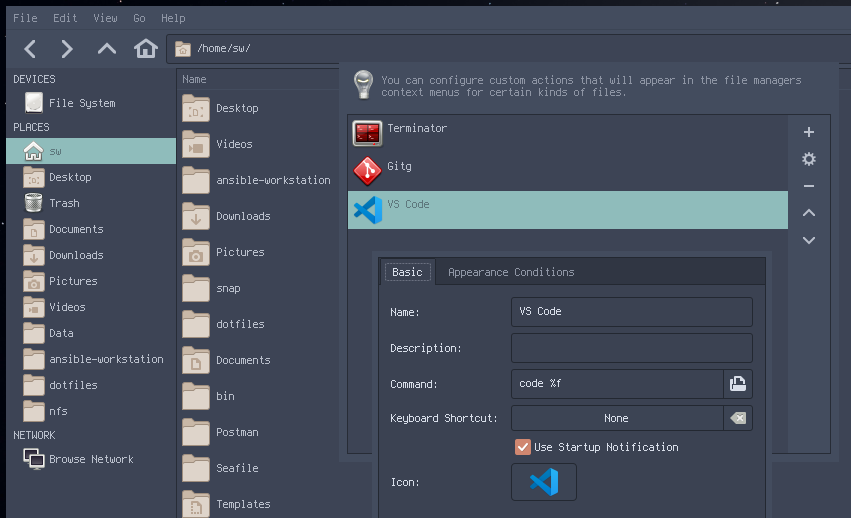
You can create “custom actions” readily available from a right-click (for example, open VS code from this folder, or gitg).
Taking notes
Quick notes
For quick notes I use xpad, a lightweight “post-it” app available in Fedora repository.
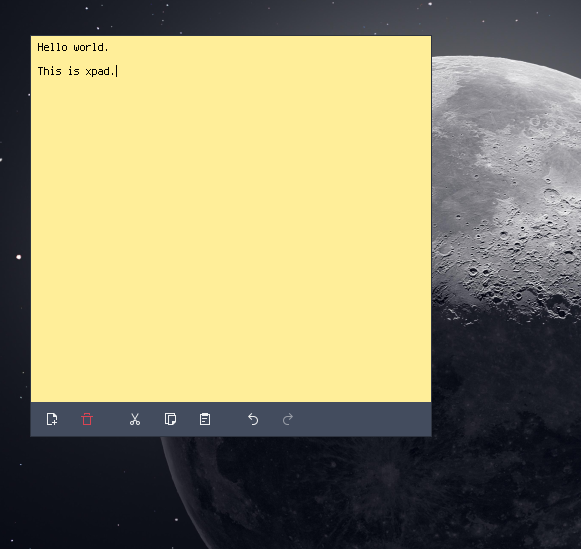
Notes are stored under ~/.config/xpad. I moved my notes to my cloud storage and symlinked.
You can toggle notes to appear/disappear with xpad --toggle. Obviously I made a keyboard shortcut in i3 to toggle my notes.
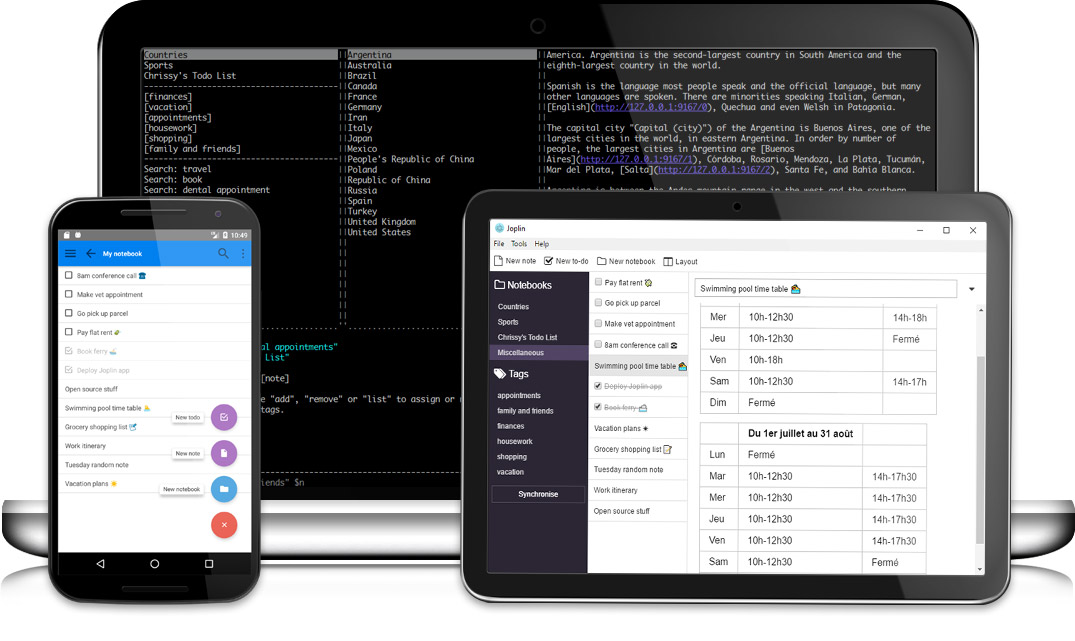
Notes that are meant to stay
For notes that I want to keep and refer to in the future, I use Joplin.
It comes with Linux and Android apps.
I save my notes on the filesystem, in a Seafile dedicated Library.
Git
I run a self hosted Gogs instance in which I store my dotfiles, my Ansible playbooks, etc.
This allows me to test a new i3 configuration on the personal machine, and when I’m happy with the result I can push to the git repository and “promote” to the work VM.
Desktop Screenshots and GIF Recording
Screenshots
I use scripts to take care of screenshots and screencasts.
For screenshots, the script uses Flameshot, available in Fedora repo.
I wrote a script on top of Flameshot because my job consists in part of writing reports.
So anytime I take a screenshot, it asks if the screenshot is aimed for a report.
If it is, then the script plays the screenshot in the right folder, and I get the asciidoc block of code I need to use in my report to point to the new image.
#!/bin/bash

zenity --question --default-cancel --text="Is the screenshot for an engagement journal?"
ej=$?

if [ "$ej" == "0" ]; then
    DEST="${HOME}/Documents/ENGAGEMENT_REPORTS_CURRENT/images"
    NAME_IMG=$(zenity --entry --text="Engagement Journal Image Name (do not add extension .png)")
    if [ "$?" == "1" ]; then
        notify-send 'Screenshot cancelled'
        exit 1
    fi
    PATH_IMG="${DEST}/${NAME_IMG}.png"
else
    DEST="${HOME}/Pictures/SCREENSHOTS"
    SCREENSHOT_DATE=`date +%Y-%m-%d_%H%M%S`
    PATH_IMG="${DEST}/${SCREENSHOT_DATE}.png"
fi

if [ ! -d "${DEST}" ]; then
    mkdir -p ${DEST}
    notify-send Screenshot "Created the screenshot directory"
fi

if [ -e $PATH_IMG ]; then
    zenity --warning --text="File exists!"
    exit 1
fi

RESULT_CAP=$(sleep 0.2; flameshot gui -p $DEST -r > $PATH_IMG && head -n 1 $PATH_IMG)

if [[ $RESULT_CAP != "screenshot aborted" ]] ; then
    xclip -selection clipboard -target image/png -i $PATH_IMG

    if [ "$ej" == "0" ]; then
        notify-send "EJ screenshot taken ${PATH_IMG}"
        zenity --entry --entry-text="image::/report/images/${NAME_IMG}.png[500,500,align=center]" --text="Copy-paste Asciidoc image path:"
    else
        notify-send "Screenshot taken ${PATH_IMG}"
    fi
else
    notify-send 'Screenshot aborted'
    rm -f $PATH_IMG
fi

exit 0
Screencast
In house script and ffmpeg (DEPRECATED)
For screencasts, the script takes advantage of ffmpeg. You should run the script a first time, and run it again for the cast to stop.
#!/bin/bash

TMPFILE="$(mktemp -t screencast-XXXXXXX).mkv"
OUTPUT="$HOME/Videos/screencast-$(date +%F-%H-%M-%S)"

pgrep ffmpeg > /dev/null

if [ "$?" != 0 ]; then

    notify-send 'Starting screengrab. Choose the section to grab.'

    read -r X Y W H G ID < <(slop -f "%x %y %w %h %g %i")

    if [ -z "${X}" ]; then
        notify-send "Screengrab aborted"
        exit
    fi

    # This process should be killed before it continues
    ffmpeg -f x11grab -s "$W"x"$H" -i ${DISPLAY}+${X},${Y} "$TMPFILE"

    # Generating the GIF
    ffmpeg -y -i "$TMPFILE"  -vf fps=10,palettegen /tmp/palette.png
    ffmpeg -i "$TMPFILE" -i /tmp/palette.png -filter_complex "paletteuse" $OUTPUT.gif

    mv $TMPFILE $OUTPUT.mkv
    notify-send "$OUTPUT.gif: $(du -h $OUTPUT.gif | awk '{print $1}')"

    trap "rm -f '$TMPFILE'" 0

else

    notify-send 'Stopping screengrab.'
    killall ffmpeg

fi
Peek
I now use peek to record GIF of my desktop.
Firefox
Firefox is my default browser.
I use only a few extensions.
The most interesting is Power Tabs.
Bookmarks
For bookmarks I use a self-hosted Shaarli instance.
Over the years I’ve used Delicious, Pinboard and some others, but Shaarli is so much better. It also comes with a nice API.
I actually developed a Shaarli extension for Ulauncher:
Tmux
I use tmux, admittedly not enough.
This is my config:
unbind C-Space
unbind Space
unbind s
unbind '"'
unbind %
unbind r
unbind m
#set -g prefix C-Space
set -g prefix M-Space
unbind C-b
#bind-key Space send-prefix
setw -g mouse off
## Start numbering at 1
set -g base-index 1
setw -g pane-base-index 1
bind w choose-tree -G
bind-key x kill-pane
set -g history-limit 30000
setw -g alternate-screen on
set -s escape-time 50
bind | split-window -h
bind - split-window -v
bind -n F12 next-window
bind '&' select-window -t 1
bind 'é' select-window -t 2
bind '"' select-window -t 3
bind "'" select-window -t 4
bind '(' select-window -t 5
bind '§' select-window -t 6
bind 'è' select-window -t 7
bind '!' select-window -t 8
bind 'ç' select-window -t 9
bind 'à' choose-tree -G
bind m next-layout
bind r source-file ~/.tmux.conf \; display "tmux.conf reloaded!"
bind > swap-pane -D # swap current pane with the next one
bind < swap-pane -U # swap current pane with the previous one
######################
### DESIGN CHANGES ###
######################
set -g window-active-style 'fg=colour250,bg=black' # active
set -g window-style 'fg=colour247,bg=colour235' # inactive
set-option -g visual-activity off
set-option -g visual-bell off
set-option -g visual-silence off
set-option -g bell-action none
set -g default-terminal "screen-256color"
setw -g clock-mode-colour colour1
set -g @cpu_low_fg_color "#[fg=black]"
set -g @cpu_medium_fg_color "#[fg=black]"
set -g @cpu_high_fg_color "#[fg=black]"
set -g @cpu_low_bg_color "#[bg=#00ff00]"
set -g @cpu_medium_bg_color "#[bg=#ffff00]"
set -g @cpu_high_bg_color "#[bg=#ff0000]"
set -g status-interval 2
set -g status-bg black # status bar bg color
set -g status-fg white # status bar fg color
set -g status-left '#[fg=colour233,bg=colour245] %H:%M:%S #[fg=colour245,bg=colour240] #S #[fg=colour240,bg=black] '
set -g status-left-length 30
if-shell 'test "$(uname)" = "Darwin"' 'set -g status-right "#[bg=black,fg=brightgreen] #{cpu_bg_color}#{cpu_fg_color} CPU: #{cpu_percentage} #[fg=colour241]#[fg=colour233,bg=colour241,bold] #(sysctl -n vm.loadavg) "'
if-shell 'test "$(uname)" != "Darwin"' 'set -g status-right "#[bg=black,fg=brightgreen] #{cpu_bg_color}#{cpu_fg_color} CPU: #{cpu_percentage} #[fg=colour241]#[fg=colour233,bg=colour241,bold] #(tmux-load.sh) "'
set -g status-right-length 50
set -g status-position bottom
set -g status-justify left
setw -g window-status-current-format '#[bg=black,fg=green] #I> #[fg=colour255]#W ' # status bar for active window
setw -g window-status-format '#[bg=black,fg=red] #I_ #[fg=colour250]#W ' # status bar for non active window
set -g window-status-activity-style 'bg=colour232,fg=colour247,blink' # blink on activity
set -g window-status-bell-style 'bg=colour232,fg=colour01,blink' # blink on bell
set -g monitor-activity on
set -g pane-border-status bottom
set -g pane-active-border-style fg=green
set -g pane-border-style fg=red
set -g pane-border-format "#[fg=red,bg=black]#{?client_prefix,[ ● ],[ ]}#{?window_zoomed_flag,[ Z ],}"
set -g @plugin 'tmux-plugins/tpm'
set -g @plugin 'tmux-plugins/tmux-sensible'
set -g @plugin 'tmux-plugins/tmux-resurrect'
set -g @plugin 'tmux-plugins/tmux-cpu'
run '~/.tmux/plugins/tpm/tpm'
DNF / Flatpak / Snap / Pip
My environment is automated with Ansible.
When a package is not available, I usually find it as a Flatpak, Snap, or at the very least pip.
Ansible has modules for all of those, so it is very easy to maintain your env.
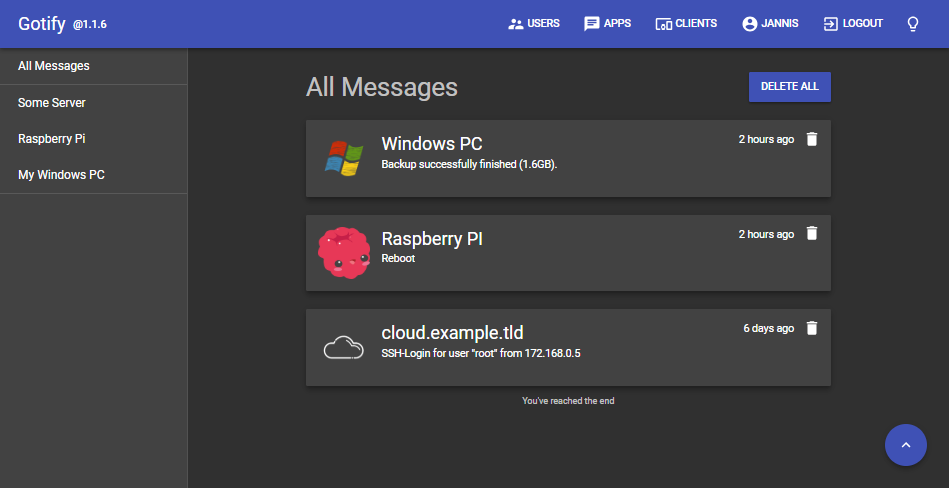
Notifications
For pretty much everything (backup, anything that needs my attention), I use a self-hosted Gotify.
It comes with a web interface, an API and an Android app.
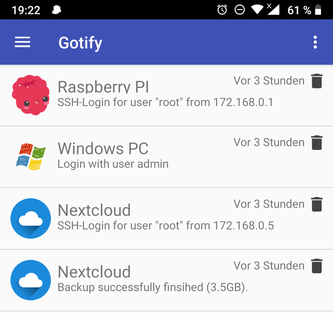
So given the API to trigger notifications, you could imagine a script that checks your battery level of your laptop, and notifies your Android phone when the battery is low.
Example:
curl "https://push.example.de/message?token=<apptoken>" -F "title=my title" -F "message=my message" -F "priority=5"
Another example: when I build the sources of this blog, I use Ulauncher to trigger the job through a script, and the script notifies me when the blog is updated.
Music Player
I use CMUS, a command line music player: https://cmus.github.io/
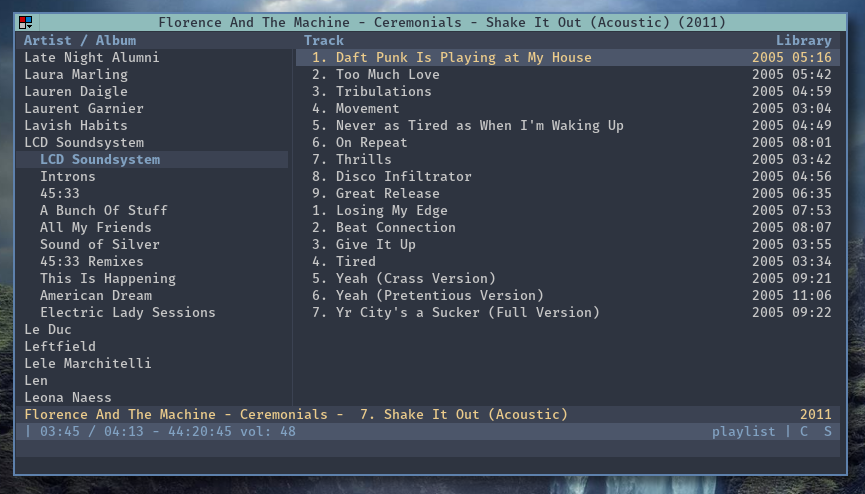
cmus comes with cmus-remote which allows you to program and interact with your music player.
$ cmus-remote -Q
status paused
file /path/to/music/blah.mp3
duration 253
position 225
tag artist Artist
tag album Album
tag title title
tag date 2011
tag genre Indie
tag discnumber 02
tag tracknumber 07
tag albumartist Artist
set aaa_mode all
set continue true
set play_library false
set play_sorted true
set replaygain disabled
set replaygain_limit true
set replaygain_preamp 0.000000
set repeat false
set repeat_current false
set shuffle true
set softvol false
set vol_left 48
set vol_right 48
This allows me to have a i3block widget showing what’s playing.
I also send notifications to my LaMetric smart clock when a song plays, with a script.
The script can be enabled with:
:set status_display_program=/path/to/script
The script:
#!/bin/bash

# Notify Lametric clock when playing/pausing tracks

# Inspired by /usr/share/doc/cmus/examples/cmus-status-display
# Enable with ":set status_display_program=cmus-status-display"

while test $# -ge 2
do
	eval _$1='$2'
	shift
	shift
done

if test -n "$_file"
then
	h=$(($_duration / 3600))
	m=$(($_duration % 3600))

	duration=""
	test $h -gt 0 && dur="$h:"
	duration="$dur$(printf '%02d:%02d' $(($m / 60)) $(($m % 60)))"

	SONG="[$_status] $_artist - $_title"
	#SONG="[$_status] $_artist - $_album - $_title ($_date) $duration"
elif test -n "$_url"
then
	SONG="[$_status] $_url - $_title"
else
	SONG="[$_status]"
fi

curl --request POST \
  --url http://clock.example.org:8080/api/v2/device/notifications \
  --header 'authorization: Basic XXXXXXXXXXX' \
  --header 'content-type: application/json' \
  --data "{
   \"icon_type\": \"none\",
   \"model\": {
        \"frames\": [
            {
               \"icon\":10685,
               \"text\":\"${SONG}\"
            }
        ]
    }
}
"
CMUS can also be remote controlled. It must be started with cmus --listen 0.0.0.0 and port tcp/3000 must be opened.
Check https://github.com/cmus/cmus/wiki/remote-control for remote clients.