Home Assistant + Conbee 2 Zigbee Gateway + Xiaomi Button + Zoneminder + LaMetric + Telegram = a smart 15 euro doorbell
So you want a smart doorbell? I have wanted one for a long time.
My expectations:
- as open source as possible
- notifications on phone and other devices
- notified when at home (obviously) but also when not at home
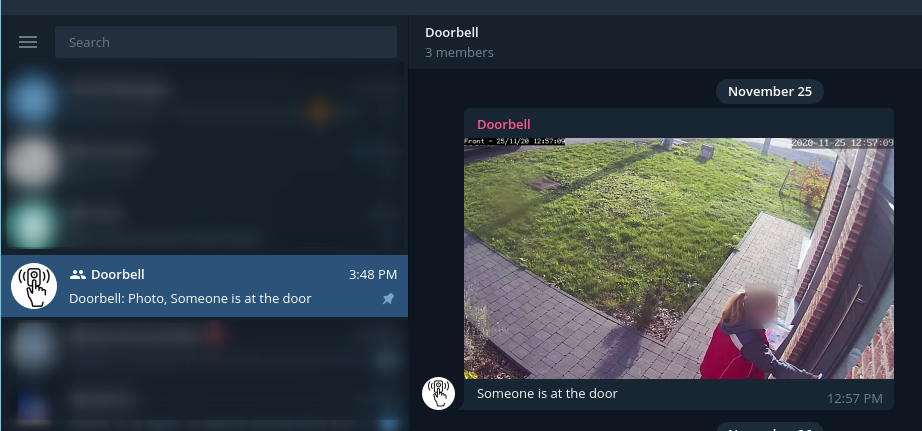
- I want a photo of the person, I don’t need to see the face in the notification, I only want to be able to tell if that’s the postman, the UPS guy, a neighbor or someone else (I can also review Zoneminder footage anyway)
- fast, definitely under one second between the press of the button and the notifications
- the doorbell should be able to withstand rain
My problems:
- no electricity or possibility of cabling around the front door frame
- I don’t want any device relying on some cloud (Ring and Amazon or such)
- A chime would certainly not be loud enough, I tend to wear headphones in my office most of the day
This is the end result, a notification in a Telegram group:
A notification on my LaMetric smart clock:
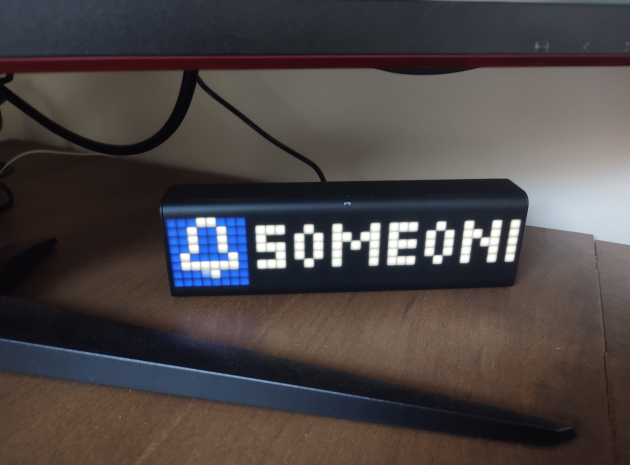
The clock will display a “Someone is at the door” message in a loop until I tap the button at the top of the clock.
Want the same setup? Read on!
First, I’m definitely lying on the 15 euro click-baity statement.
If you don’t already own all that stuff I used to achieve this project you will end up with a couple hundred of euros/dollars bill:
- server in the garage beefy enough to run a couple of Libvirt VMs: around 600 euros in my case because the server does more than Home Assistant. You can definitely go lower.
- outdoor camera: about 65 euros (Eminent EM6360, discontinued)
- Conbee 2 Zigbee gateway: less than 40 euros (Amazon)
- LaMetric clock: typically 200 euros, got for 160 with coupon on their official store. An expensive gadget but totally worth it if you ask me
- finally Xiaomi button WXKG01LM: under 20 euros if you are impatient (Amazon), about 10 euros on Aliexpress
Check those links to learn more:
- Conbee 2: https://phoscon.de/en/conbee2
- Button: https://www.amazon.fr/Xiaomi-Interrupteur-connect%C3%A9-Wireless-Switch/dp/B07X71ZS7J/ref=sr_1_14?dchild=1&keywords=xiaomi+aqara&qid=1607612309&sr=8-14
- Clock: https://store.lametric.com/products/lametric
Also, if you don’t own all that stuff already, do you really want to create and run such a complex infrastructure just for your doorbell use case? Probably not.
I happened to own everything already besides the Zigbee gateway and the button, and my server runs 24/7 so that was an inexpensive addition. Also I have learned about Zigbee on the way!
Lastly, make sure that Zigbee devices you buy are compatible with the Conbee 2 gateway. You can search here: https://phoscon.de/en/conbee2/compatible
My button is the WXKG01LM model.
Home Assistant (HA)
I will assume you already have Home Assistant or Hassio running.
Conbee 2
Placement
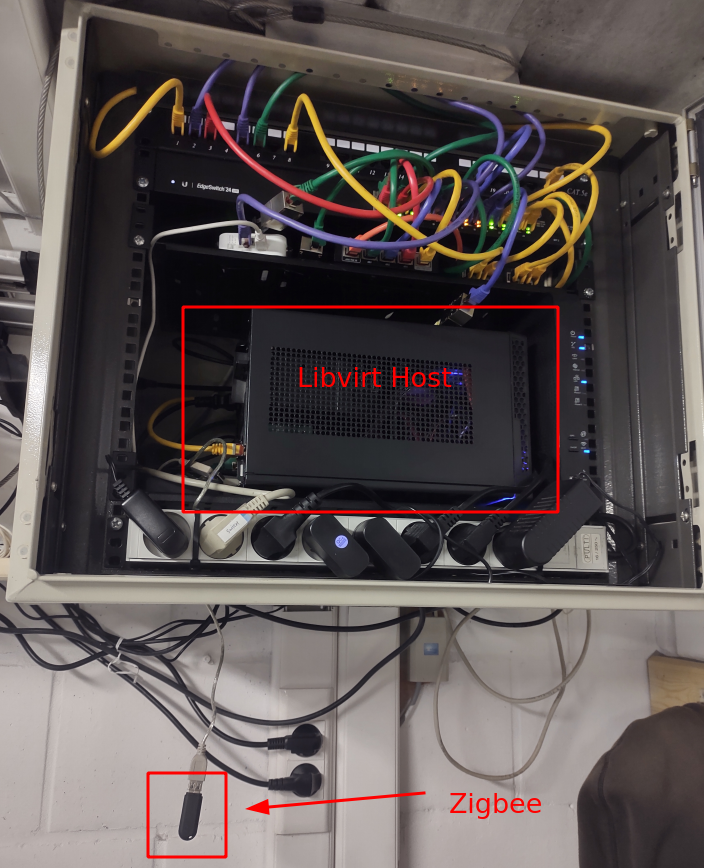
Make sure to plug your Conbee 2 into a USB cable extension, and not directly in the back of your machine. I have read here and there that plugging directly in the back of your machine reduces the range of the device.
This is important especially in my case since my home server is in a rack and this would suffer from a faraday cage effect.
Libvirt
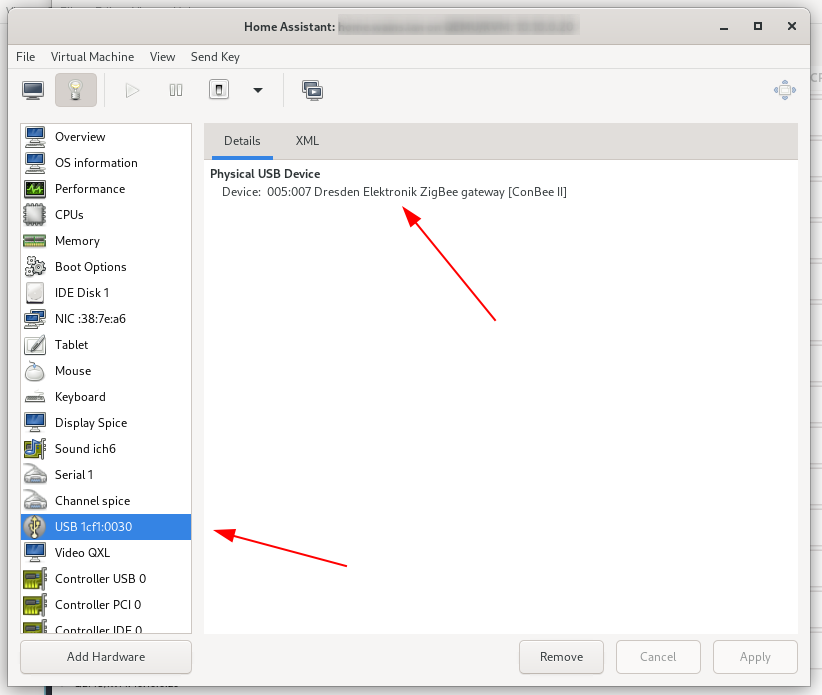
My home assistant/hassio runs in a VM.
Attach the USB device to the guest.
deCONZ
You will need to install the deCONZ add-on in home assistant.
deCONZ will allow you to configure new Zigbee sensors.
Install deCONZ and make sure it will start at boot:
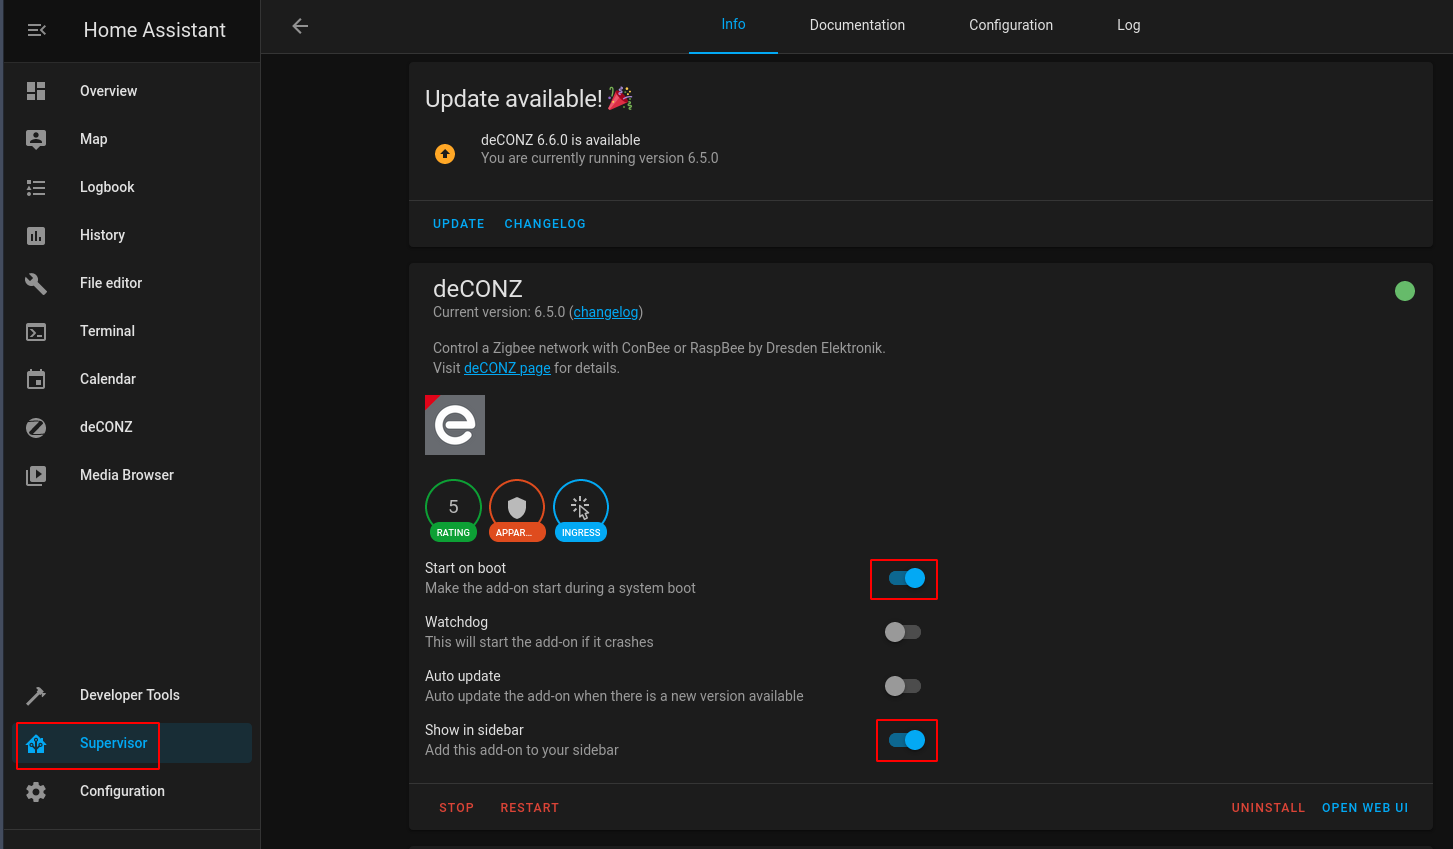
From the left menu open up the deCONZ menu, and you will see two options:

Choose phoscon.
You need to pair your button with the gateway.
I won’t provide a full step by step screenshot tutorial here as it is pretty easy to achieve.
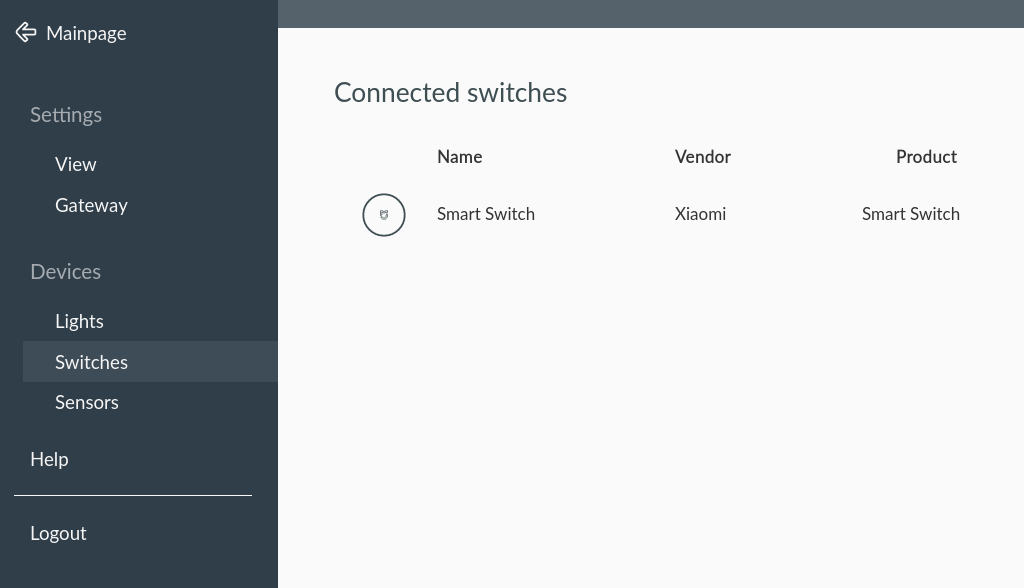
Pairing a new device requires you to click the reset button on the button, and tell the gateway to scan for new devices.
If pressing for 5 seconds on the reset button doesn’t work, try a short press. Make sure to stand close enough to your gateway.
The end result should be this:
Now if you go in the Configuration > Integration, Home Assistant should suggest to enable the deCONZ integration:
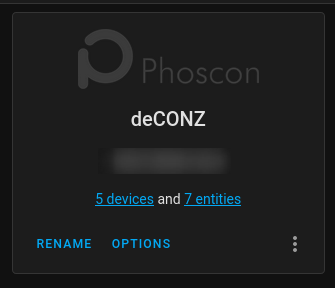
Enable it and it should report 2 devices, the gateway and your button.
Listening to Zigbee events
If you press on the button, events will be sent on a deconz_event.
You can see those by listening to the events under Developer Tools > Events in Home Assistant:
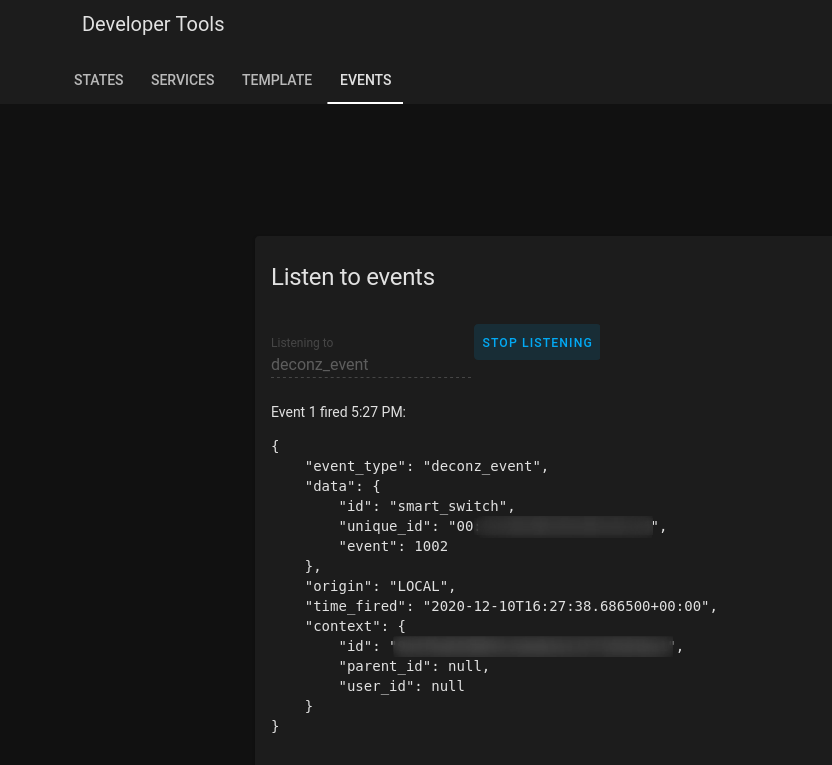
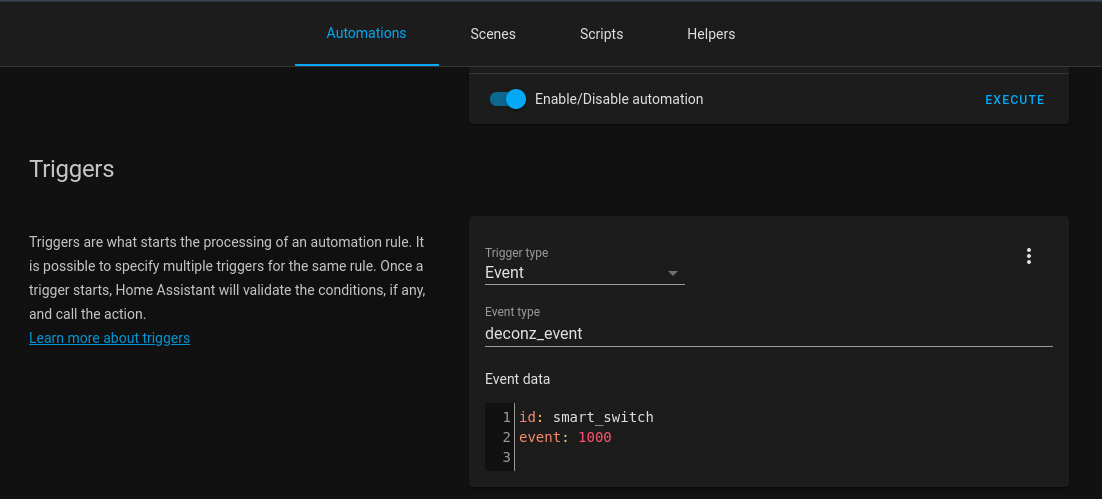
The event number corresponds to a specific action on the button.
- 1000 initial press
- 1001 single hold
- 1002 single short release
- 1003 single hold release
- 1004 double short press
- 1005 triple short press
- 1006 quad short press
- 1010 five+ short press
https://github.com/dresden-elektronik/deconz-rest-plugin/wiki/Xiaomi-WXKG01LM
Any press always triggers an event 1000. Keep this in mind for your automation.
If you need to debug deCONZ add the following to your configuration.yaml config file in Home Assistant:
logger:
  default: info
  logs:
    pydeconz: debug
    homeassistant.components.deconz: debug
Automation
Now create a new automation in HA.
Your trigger will be the event on deconz_event:
The notification on Telegram is done through a service.
Follow the instructions here: https://www.home-assistant.io/integrations/telegram/
You can use your new notification:
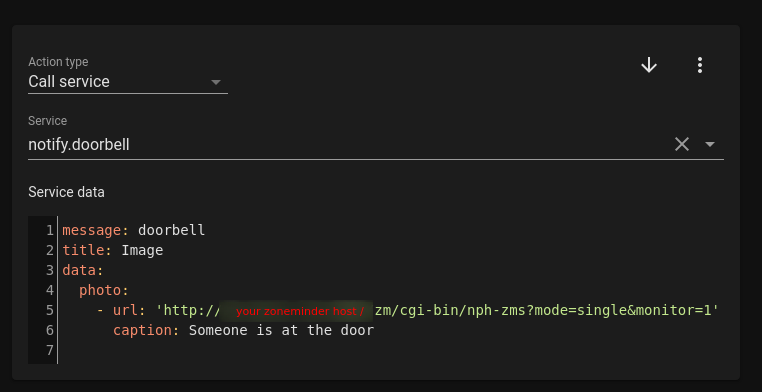
You can see how I attach a camera capture in the Telegram message. Just provide the correct URL and it will just work.
I also have a LaMetric notification in place, as you can see in a picture at the beginning of this post.
You have the possibility to push messages to your LaMetric clock through an integration:
https://www.home-assistant.io/integrations/lametric/
In my configuration.yaml I have:
lametric:
  client_id: XXXXXX
  client_secret: XXXXXX

notify:
    - name: lametric_1
      platform: lametric
      lifetime: 20
      icon: a7956
      cycles: 0
      priority: info
      icon_type: none
Note: You can obtain your client ID and secret on https://developer.lametric.com
In my automation notification, I override the icon and priority there:
service: notify.lametric_1
data:
  message: Someone is at the door
  data:
    icon: a24087
    cycles: 0
    priority: normal
    icon_type: none
Obviously you can implement any other type of notifications. LaMetric and Telegram are good enough.
I didn’t use Gotify this time because I needed to attach the capture to the message. Gotify can only show images from remote URLs. My Zoneminder is not opened to the world for obvious reasons so I went with Telegram.
Also I created a Telegram group and put my girlfriend and myself in there. My girlfriend gets notified as well now.
Conclusion
I mostly struggled with Phoscon initially because I was discovering the Zigbee world.
I also struggled with the Conbee, because it got disconnected from the VM after a firmware upgrade and didn’t notice immediately.
Ever since I stuck the button to my door, it has not failed once.
I will keep an eye on the battery. Xiaomi says the battery should last two years. I put the button at the door 15 days ago and the battery went from 100% to 94%. It seems to decrement by 3% at a time. Or maybe it gets updated only when the button is pressed? Not sure.
When it comes to rain, the Xiaomi button is NOT rated for those conditions, but I have read a few comments on Reddit from people using the button for two years in British weather. I think it’s going to do fine, I will report back if it doesn’t survive its first downpour.
One of my problems was that I didn’t want to rely on clouds. I do: Telegram and LaMetric. I could use Gotify but I wouldn’t get the picture attached to the notification which is something I really want. Also, I’m not that bothered with Telegram API today. I can always change the notification system should my opinion of Telegram change.
One of my main concern was the speed of notifications:
- pressing on the button triggers the automation immediately
- the camera capture shows the person with their finger still on the button
- the LaMetric clocks notifies me within the second
- Telegram on my phone might take a couple of seconds to ring, which is probably due to the Android system
- Telegram on desktop reacts faster than the phone
Please reach out in the comments if you need help implementing something similar!